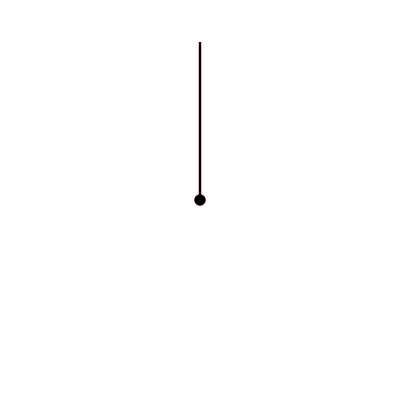
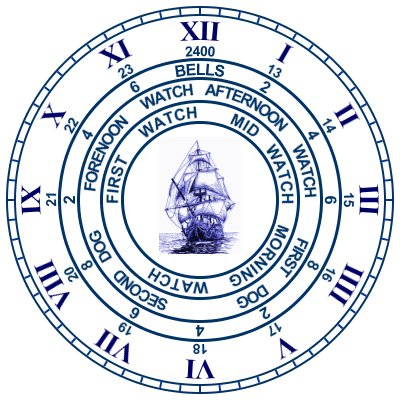
@ Hi Folks, After receiving some helpful guidance for a couple of members, I have managed to get this far with a face I am working on. But I can’t manufacture the hands I need for it, as I simply don’t know enough about using Photoshop, or Gimp (I tried both) So if anyone could help me with 2 problems I am having 1) I want to put a dividing line between each group of “Watches”…I’ve tried drawing one in with P.S. & Gimp, but I haven’t a steady enough hand to get acceptable results. I tried using the WFD hand maker, but it blots out some of the circle outline…so any help would be appreciated. Now to the Hands! I have messed about with tring to design some in both P.S. & Gimp but I can’t get the “Open” look I am after as it has to be transparent in the middle (See real watch photo) so the writing can be seen underneath. So again, any help or tips on how to achieve this look would be very much appreciated. Ok, so here is the face I have so far and a picture of the real watch with the type of hands I am trying to create.
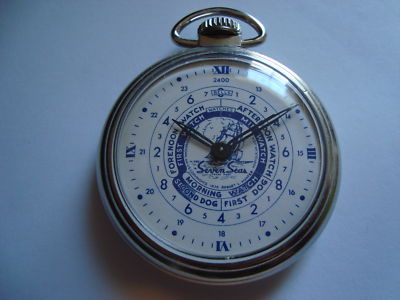
I’d like to also say that this watch owes it creation to a number of members who all helped me along in the right direction…including @Nicholas_Herczeg, @R_Sauvalle, @Dr_Andy_Vishnu, @doubledad, Thanks for helping a newbie along Fella’s! Cheers, Doons
Oh and credit for the original watch goes to the Nautical Pocket Watch Company,now out of business.
2 Likes
@Doonsbury, try using 100% transparent fill(click the little dropper by the colour and click on the checker board background) and adjust the stroke as needed. The stroke is the border to the fill. You might also want to adjust the point 1 or point 2 X curve, I believe, ever so slightly to mimic the hand’s curve. Another thing that you can do if you want to make dynamic hand’s is to emboss the hand and use a white or light blue fill at 70-80% transparency and a 2-4 pixel stroke. It gives an inner glass appearance. Dark red looks like Ruby, green looks like emerald and dark blue looks like sapphire. You might have adjust the transparency, but any colour can be used. I dunno if it would work with this face, but you can save the idea for a future design. Make sure to experiment with light angles and shadowing.
1 Like
@Nicholas_Herczeg Thanks for the advice Nicholas…unfortunately 99% went way over my head mate…as I said, I have only been using P.S. & GIMP for about 4 days, so it’s going to be ages before I manage to wade through all the in’s and out’s of either of them. As an example, I spent well over 3 hours playing around in both PS & GIMP whith the ship picture and still only got it a fraction better than when I started! I did play around with the hands a bit more on WFD (Mostly the curvature) and got something a little better than I had…but still nothing at all that is transparent in any way…but it all take time I guess. Cheers Doons.
As you “put a dividing line between each group of Watches” you’ll recognize - I’m sure - that they must line-up with the proper “times” and - therefore - your type needs to be sized and oriented/flipped to “fit” each section.
1 Like
@doubledad Yep, I know they are slightly out of correct alignment at the moment. I am playing around with the layout/spacing to get them in the correct position. It gets interesting because the only way I can see of altering their position is to alter the spacing between two words (Not two watch names) By altering the spacing between First & dog, it alters the spacing on both ends of the words towards the next watch name…trial and error I guess. But drawing a dead straight line between the watch names…I can’t do it in PS or GIMP freehand…just hoping it can be done mechanically. Cheers, Doons
Once you have the “watch” spaces defined, you must place type separately in each space, not all words at once. RE: “drawing a dead straight line between the watch names”, in PS use your pencil to select a starting-point, hold-down the shift key and select the end-point
@doubledad Thanks for that Dad. I found that I can draw a dead straight line between watch names by using the “Hand” maker in WFD and positioning the layer under some of the other layers so it doesn’t obscure any of the existing face. I am still playing with getting the watch names in exactly the right place, so thanks for the tip about naming them separately. Cheers, Doons
@doubledad Hi Dad, That tip about placing type separately in each space turned out to be some great advice! I was floundering around with all that text and thanks to your tip…it turned out to be a breeze! I now have the face looking a whole lot better than when I started…everything is positioned exactly the same as the original watch…all the text the correct way up, etc…and along the way I learned a whole lot more about WFD, so a great result! Cheers, Doons
@Doonsbury, in WFD with any shape, including hand’s, there are 2 colour values you can edit, the fill(inside) and the stroke (outside border), in that order. In the colour menu(by clicking directly on the colour), you have the basic palate, as well as several other options. HSV(hue, saturation, value) is my most common go-to, besides the basic palate. Hue controls up and down movement on the colour board. Saturation controls left and right(dark to light). Value controls the up and down on the colour bar on the side. Then there is transparency. 0% transparency is completely opaque where 100 is see through. Do realize that adding transparency will obviously lighten your colour, so if you’re trying to get a specific colour, you may have to darken it to compensate or reduce transparency. TL: DR If you want to make a transparent hand, make the first colour transparent and the second, the colour you want the hand to be(in this case black or navy blue, although it looks black). This will create a hand with a hollow inside. You can even stack multiple hands in the same area to create different effects. By exporting the different parts as one element and importing it back in as an image, it will still function as a hand, but be more creative looking.
Last tip, if you hit the button next to the colour you want to change and click anywhere outside the watchface, it will automatically become 100% transparent. I believe it’s transparent white, but I’m not completely positive. Anyways, I hope this clarifies things a little bit, at least.
1 Like
@Nicholas_Herczeg Hi Nicholas, Many thanks for that in depth explanation mate! I am just getting on to creating the right hands now, so I will be able to experiment a lot more now that you have “Walked” me through that use of the transparency effect. You were 100% correct about WFD being very intuitive! Once I started getting more involved with making a watch face I discovered that a great many of the effects are easily found by just playing around with a face. But certainly the help I got off yourself and @doubledad made a very big difference to my understanding a lot more of how the features on WFD work. I can’t wait to try even more complicated designs now that I am getting comfortable with the program. Cheers, Doons
1 Like
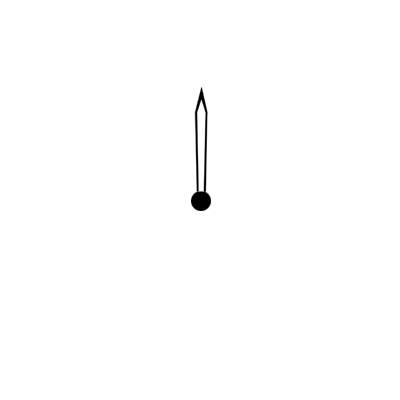
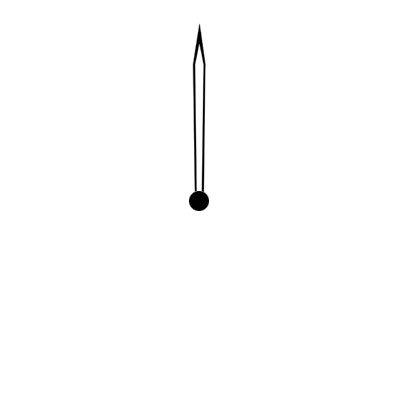
@Nicholas_Herczeg Hi Nicholas…just created my first set of transparent hands mate! To be sure they are not the best hands I’ve ever seen, but at least they work…and it’s all down to you mate. As I said, it is so easy once someone has explained how to work the effect…but when your floundering around trying to guess how to make it work…well it can get a little discouraging when nothing you are doing is working out as you wanted it too. To prove my point, it only took me a few minutes to create a set of transparent hands once I had read your last post…and I have been trying for a few days with no success. Thanks again for that info Nicholas! Cheers, Doons
At 80 years of age, I thought I knew most all programs, but WFD is new to me. Please explain…
BTW, it’s Doubledad
@doubledad Hi Doubledad (Sorry about that!) WFD stands for Watch Face Designer and it is a program created by one of our members @Marco_Ferreira for designing watch faces. I have only had the program for about 2 weeks so I am certainly no expert with it. But quite a few member’s here use it and produce some magnificent designs with it. Here is a link to the forum page that it can be found on Watch Face Designer page. After a good deal of help from @Nicholas_Herczeg I am finding it quite easy to navigate and use. Certainly it is worth taking a look at. As for the hands, thanks to Niholas’s help I have come up with something pretty close to what you posted. Cheers, Doons
@Doonsbury hey if you want to use @doubledad 's arms, just save the images to a working folder then import them with the image layer tool in WFD. If @doubledad did his work well (which I believe) then the anchor point should be dead on in the middle and the image will automatically turn around the axis in the center. btw, in WFD you can create that space very simple by using the hands tool if you do a simple hand with 2 cross sections, then add a new section and raise it (Y value) to where you want the gap to end. The gap width is (X value). It’s very simple, trust me. Nice watch, well done
P.S to use @doubledad 's hands non-black then you need to invert the colors to white so that you can use the color tint option in WFD and set it to any color you want. I think you should really use his arms, they look way more “genuine”, he did a great job on them
1 Like
@R_Sauvalle Hi, Thanks for those tips mate…it all helps when your starting out! I am starting to experiment more & more with WFD and finding out all the different things you can do with it and the many ways you can tweak values to get different effects. But I will be playing around more with creating hands and I’ll certainly try out those things you mentioned. Cheers, Doons
1 Like